Fitting a Victorian Bodice
So the skirt is mostly done, which brings us to the bodice. Now bodices are hard. They have sleeves, they have buttons, and most importantly they have to make nice with the F-word..
FIT
or why won't this wrinkle F@%!*ing go away!
Now the difference between a nice-homesewn looking gown, and a gorgeous-walked-out-of-a-tintype gown is fit. Whether it's period clothing or modern clothing you will always look your best in things that are the right size for YOU.
I'm using RH943 the basic bodice pattern here. But the fitting tips are the same for most standard bodices, including the Truly Victorian ones. And once you get it just right MAKE A COPY a bodice pattern that fits you perfectly will make the next bodice you make go together like a dream...Then one should avoid gaining 10lbs...but that's between me and this ice cream...My ice cream! Step away or I'll cut you!...ahem where was I? Right fit it once and then make a pattern to avoid doing the work repeatedly.
Here's what I started with. I don't usually sew the darts first, typically I mark them and pin them on my wearer, but my husband just isn't that good at fitting yet. So I sewed the darts and crossed my fingers that they'd give me a good starting place, and amazingly they did! (Darts are suuuper particular based on where your specific bust point is and therefore almost never fit straight out of the box, er envelope).
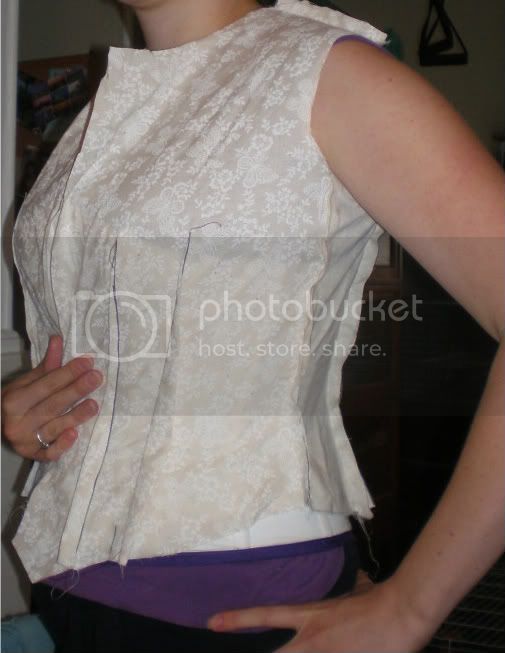
The darts are okay and the waist is pretty close, but the armscye and my sausages ain't makin' friends. Easy enough to fix, I scooped the armscye lower, and took a bit of length out of the front across the bust. Which ended up looking like this.

Not too shabby, now the hard part (on me) the back.
Backs are hard for a few reasons.
1. It's behind me and I can't see it.
2. I have a sway back which makes fitting tricky
3. I'm not that flexible.
So my poor husband got drafted to do his very best attempt. I took a straight line cross the back out where I was getting a big wrinkle because it was too long, and it came up in the shoulders to smooth out the wrinkles across the back. Remember if you see a wrinkle adjust perpendicularly.

I also had to take in a fair amount in the small of the back, cause I'm special.

And here's the end result. The sharpie marks are the lines I'm looking at for the finished garment.
Next up:...we make it in silk.
or why won't this wrinkle F@%!*ing go away!
Now the difference between a nice-homesewn looking gown, and a gorgeous-walked-out-of-a-tintype gown is fit. Whether it's period clothing or modern clothing you will always look your best in things that are the right size for YOU.
I'm using RH943 the basic bodice pattern here. But the fitting tips are the same for most standard bodices, including the Truly Victorian ones. And once you get it just right MAKE A COPY a bodice pattern that fits you perfectly will make the next bodice you make go together like a dream...Then one should avoid gaining 10lbs...but that's between me and this ice cream...My ice cream! Step away or I'll cut you!...ahem where was I? Right fit it once and then make a pattern to avoid doing the work repeatedly.
Here's what I started with. I don't usually sew the darts first, typically I mark them and pin them on my wearer, but my husband just isn't that good at fitting yet. So I sewed the darts and crossed my fingers that they'd give me a good starting place, and amazingly they did! (Darts are suuuper particular based on where your specific bust point is and therefore almost never fit straight out of the box, er envelope).
The darts are okay and the waist is pretty close, but the armscye and my sausages ain't makin' friends. Easy enough to fix, I scooped the armscye lower, and took a bit of length out of the front across the bust. Which ended up looking like this.
Not too shabby, now the hard part (on me) the back.
Backs are hard for a few reasons.
1. It's behind me and I can't see it.
2. I have a sway back which makes fitting tricky
3. I'm not that flexible.
So my poor husband got drafted to do his very best attempt. I took a straight line cross the back out where I was getting a big wrinkle because it was too long, and it came up in the shoulders to smooth out the wrinkles across the back. Remember if you see a wrinkle adjust perpendicularly.
I also had to take in a fair amount in the small of the back, cause I'm special.
And here's the end result. The sharpie marks are the lines I'm looking at for the finished garment.
Next up:...we make it in silk.