How to Tile Large Printer Pages on a Mac
How to Print Tiled Pages in Acrobat
If the other Tiling Instructions don't work on your Mac computer, this document will show you step-by-step how to print a large document as numerous letter- or A4-sized pages that you can tape together to make a full-sized pattern.
Do this first:
Download Adobe Acrobat Reader. It's free. And it works on a Mac too.
https://get.adobe.com/reader/otherversions/
Preview WILL NOT PRINT THIS. Your Mac no longer shows Adobe in Preview.
Please download Adobe PDF Viewer and print from there.
Step One
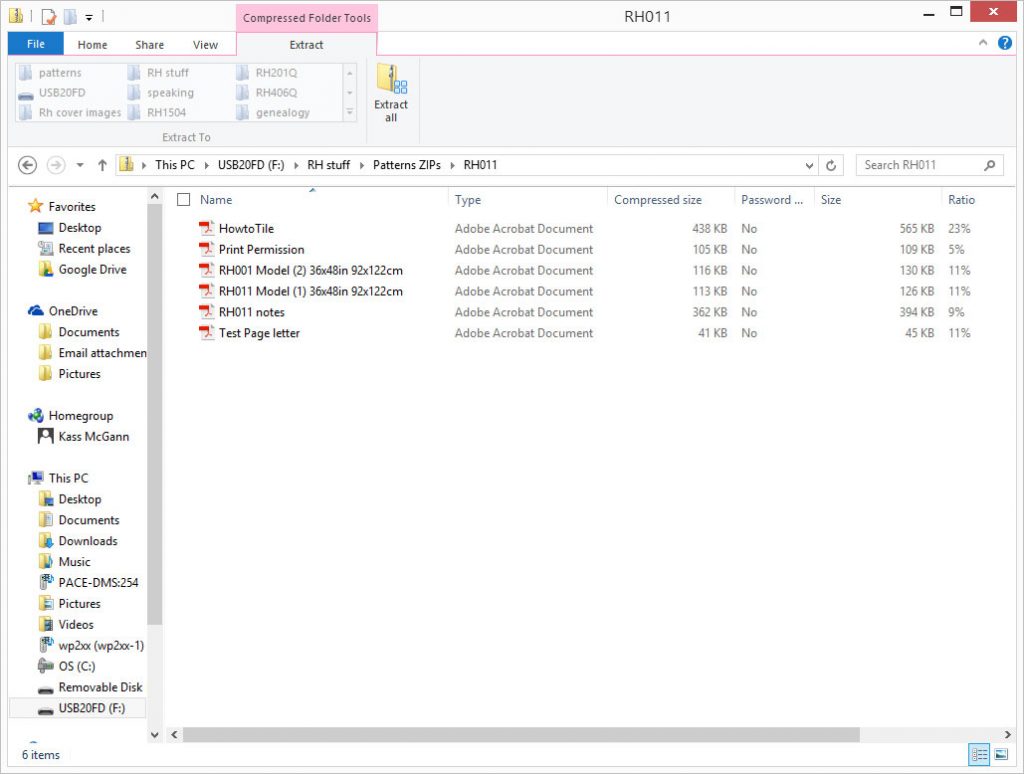
Open the zip file folder. To do this, double-click on the zipped folder. This will extract all the files to the folder you are in.
Step Two
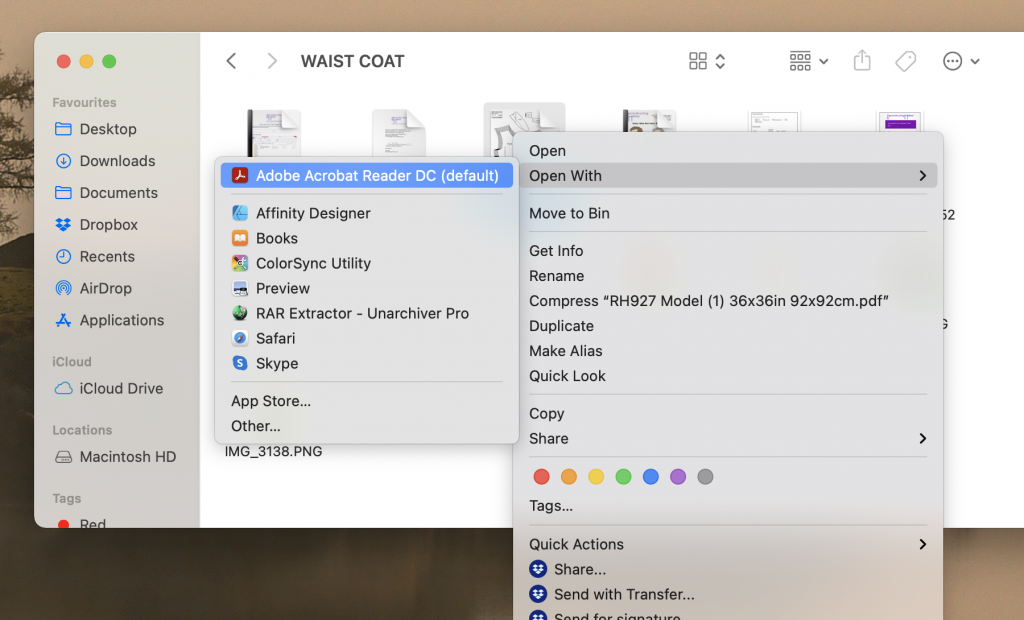
Open one of the pattern files (labeled “RH… Model…”) in Adobe Reader.
Step Three
Click on “Print” in the File menu.
A dialog box similar to the one below will appear.
Choose your printer. You will see a picture of the pattern file in the lower right.
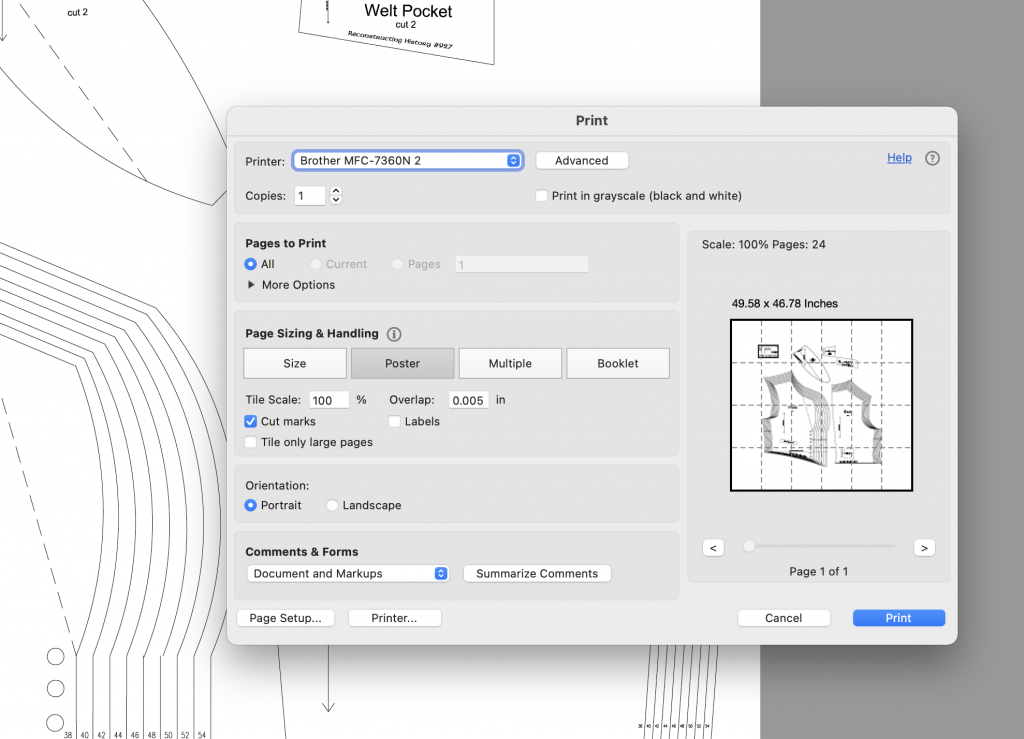
The paper size appears above the picture of the pattern, in this case it’s 8.5 x 11 inches or “letter size”. If you want to change this size to A4 or legal or any other paper size, click “Page Setup...” at the bottom of the dialog box and choose your preferred paper size from the menu. You can print tiled pages in any size, but letter or A4 is the most common for home printers.
Step Four
Click the button labeled “Poster” under “Paper Sizing and Handling”.
“Tile Scale” must read “100%” for the pattern to print at the correct size.
Increase the overlap to whatever you prefer (we use .5 in).
You will see a picture of your pattern piece tiled with dashed lines at lower right. You can change the size and orientation of these pages using overlap and page size so you can avoid wasting paper printing blank or mostly blank pages.
Select “Cut marks” or “Labels” if you wish these to print on your tiled pages. They can be very helpful when you tape the pages together.
Select Portrait or Landscape as desired.
Step Five
Click “Print” or press return on your keyboard.
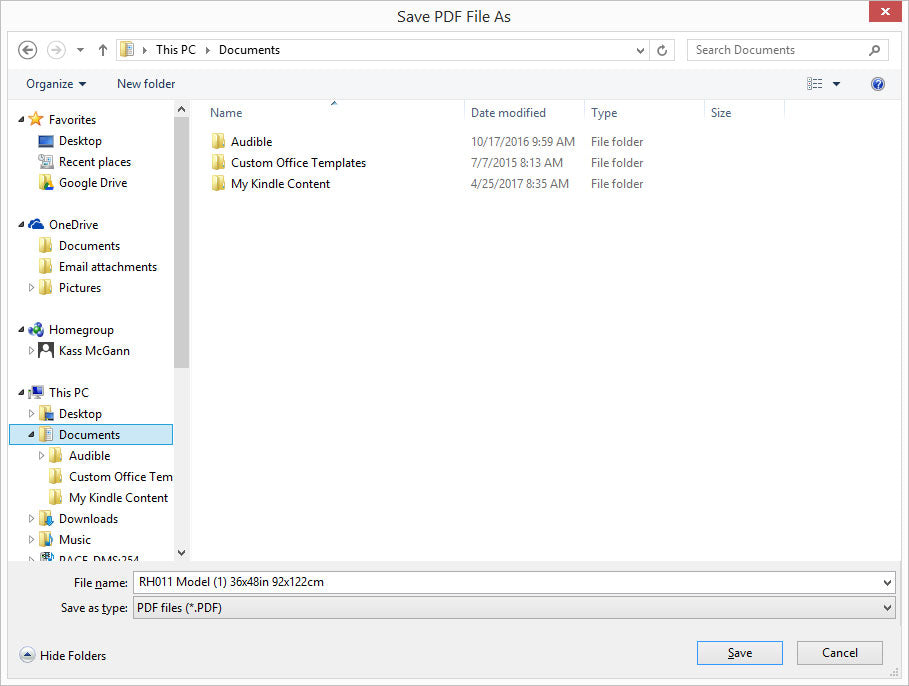
A dialog box like the one below will ask you what you want to name your file and where you want to put it. Save it somewhere you will be able to find it easily later.
Step Six
Adobe will take a few moments to create the PDF file. Once it is finished, it will open Acrobat Reader and show you the file. It will look something like this:
Step Seven
Print out the pages and tape them together and you have your pattern!
- Gather your printed paper and as a block cut the at the top cut mark for the entire stack in one go.
- Gather your printed paper and as a block cut the left cut mark for the entire stack in one go.
- You only need to cut top and lefts your first page is the very top left page so all other pages are to the right or below this and they cascade as tiles from this point.
Watch this video on how to put the pages together if you need help:
[embed]https://www.youtube.com/watch?v=etFFmwFWUsA[/embed]
Step Eight
Repeat for as many pattern pages as there are in the pattern. Most patterns are one or two. Some are three, four, and five pages. All pages are separate and labeled with their full-size dimensions in the zip file folders.
Don’t forget to print the notes (instructions, historical notes, etc.) or you won’t know how to make up the pattern!
You don't need to tile the instructions, historical notes, and covers because they print at letter/A4 size automatically.